
Learn how to use a servo to create motion.
TI LaunchPad
Breadboard
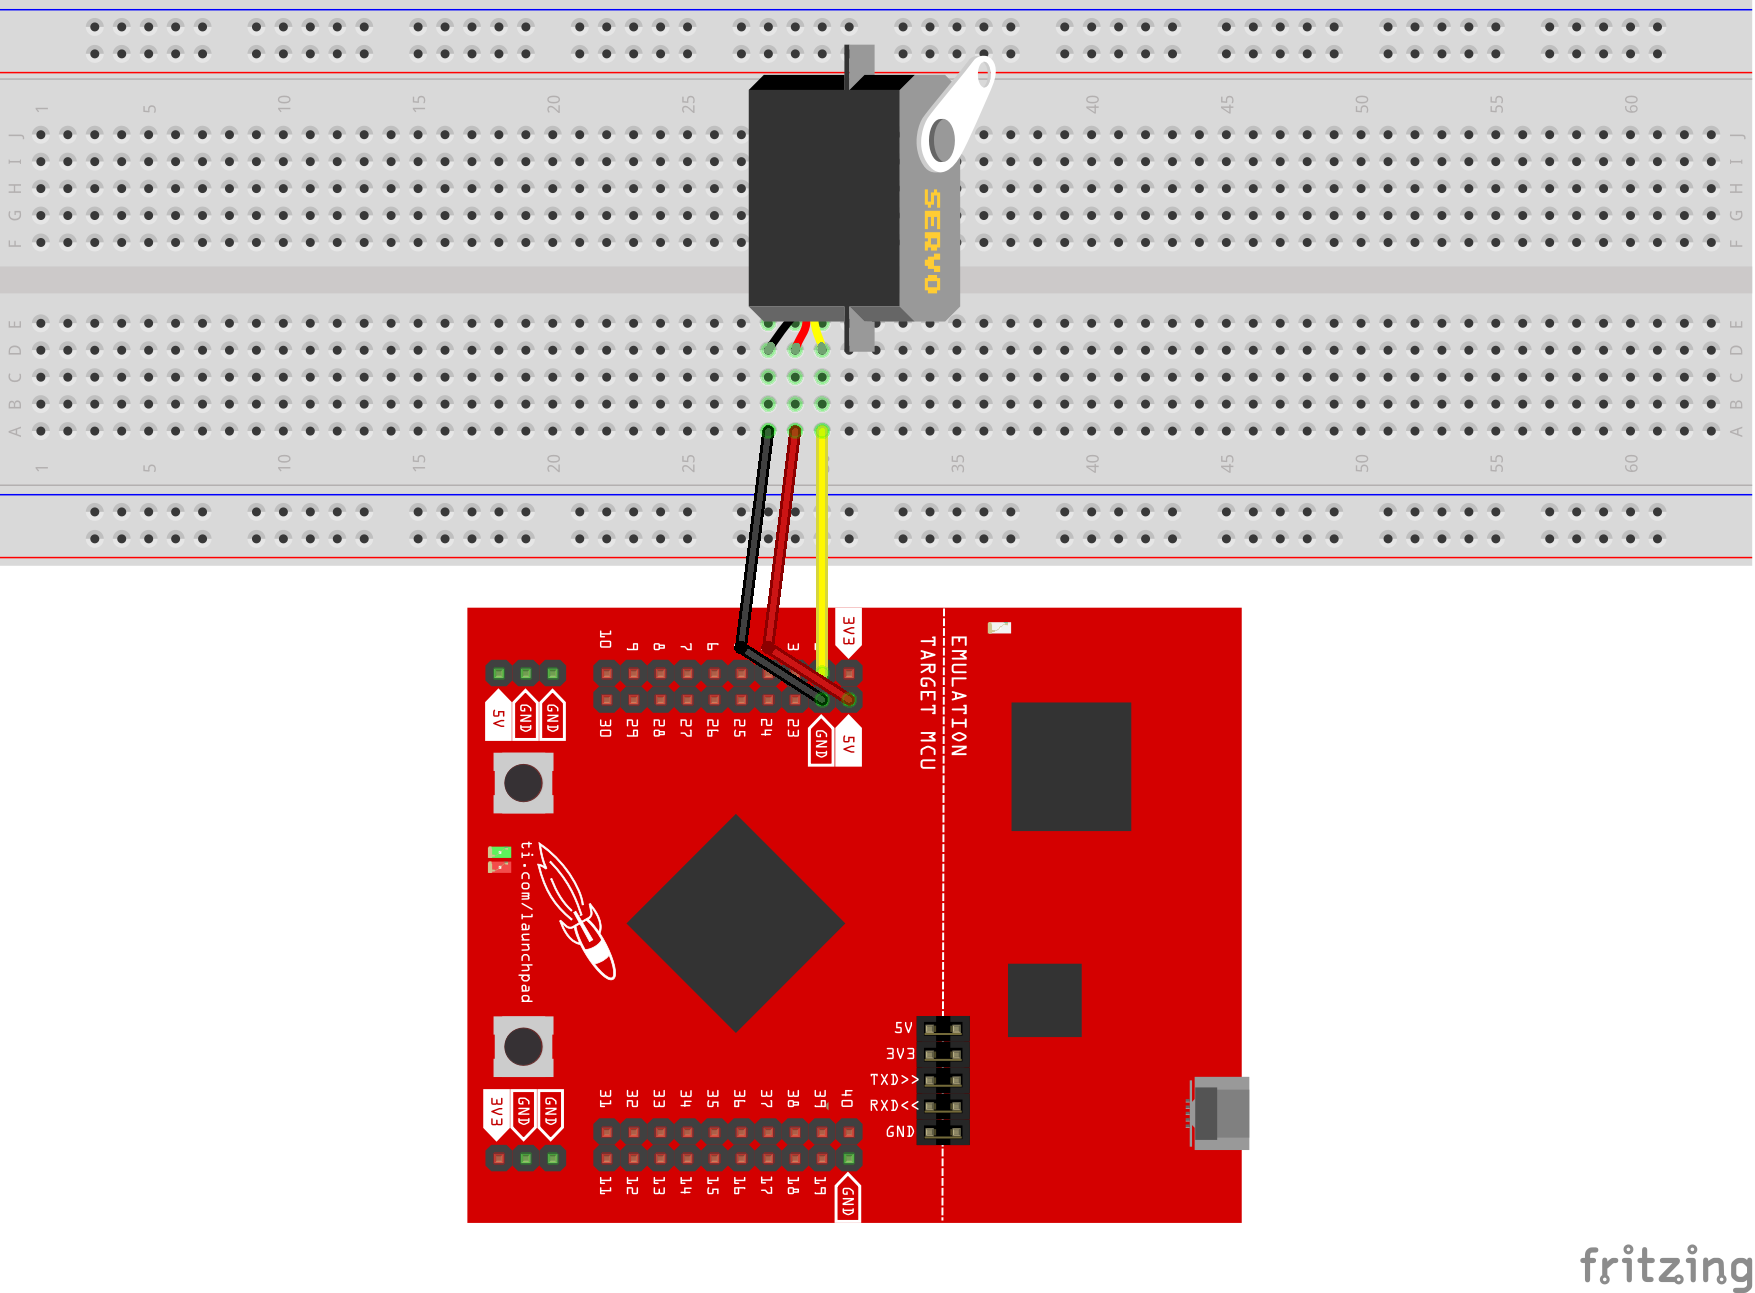
Servo
3x Jumper Wires
In this example we will use a servo, which can be more useful than motors in some projects and also easier to control. A servo has a small gearbox and some electronics inside so that we can control it directly from a LaunchPad without the assistance of a transistor or motor driver. Think of it as built in and ready to move. A standard servo can move from 0 to 180 degrees, but there are also continuous rotation servos available that let you do full rotations. Double check which kind of servo you have or want to buy. The continuous rotation servos are more popular and fun but sometimes more expensive.
We will use the Servo library to help us control the servo. Make sure the Servo.h is included in your sketch (#include <servo.h>).
A typical servo has 3 wire connections. Simply hook up the servo to GND (black wire), VCC (red wire), and a PWM pin (remaining wire).
Find the latest and greatest code example HERE on GitHub.
// Sweep
// by BARRAGAN <http://barraganstudio.com>
// This example code is in the public domain.


#include "servo.h"

Servo myservo;  // create servo object to control a servo
                // a maximum of eight servo objects can be created

int pos = 0;    // variable to store the servo position

void setup()
{
  myservo.attach(2);  // attaches the servo on pin 2 to the servo object
}


void loop()
{
  for(pos = 0; pos < 180; pos += 1)  // goes from 0 degrees to 180 degrees
  {                                  // in steps of 1 degree
    myservo.write(pos);              // tell servo to go to position in variable 'pos'
    delay(15);                       // waits 15ms for the servo to reach the position
  }
  for(pos = 180; pos>=1; pos-=1)     // goes from 180 degrees to 0 degrees
  {
    myservo.write(pos);              // tell servo to go to position in variable 'pos'
    delay(15);                       // waits 15ms for the servo to reach the position
  }
}How fast can you spin the servo? Can you make the servo go slower?
Code not uploading?
Check for errors in Energia debug window. The compiler will tell you what is happening. Errors are in red text.
Sometimes your LaunchPad gets stuck or hung up on the previous code. Unplug your LaunchPad and plug it back in to perform a full reset. This is called a power on reset. Sometimes using the RESET button can work but taking away the power and letting the microcontroller fully reset is often best.
If you have a failure to upload it could be your drivers are not properly installed. Energia will sometimes give the error "No unused FET Found" which means it can’t find a LaunchPad connected to your computer. Make sure you download the drivers for your operating system found on the Getting Started Guide.
If you had no problem with the previous Blink example, your Energia should be correctly set up. Restart your LaunchPad and restart Energia IDE if you encounter any problems. Make sure to select the right serial port and board type under the Tools menu.
Servo not moving?
Make sure you properly uploaded the code and that you properly named your variables for the pins.
Make sure you properly connected the servo. If you do not you could risk damage. If you have connected your servo incorrectly while powered up and you are experiencing problems it is possible it is broken, but try to run some sample code to verify, because it could still be a software issue.
For additional support, try searching the Energia forums on 43oh.com. We believe in you to figure out any problems, now believe in yourself and find the solution!
Corrections, suggestions, and new documentation are very welcomed. They can be contributed to the energia website repository on Github.
The text of the Energia getting started and reference guides are licensed under a Creative Commons Attribution-ShareAlike 3.0 License. The Energia reference is based on the Wiring/Arduino reference. Code samples in the guide are released into the public domain.
Energia sketches are C/C++ based and compiled with the open-source compiler MSPGCC or arm-gcc-none-eabi. The Energia language comes from Wiring. The Energia environment is based on Processing and includes modifications made by Wiring and Arduino.
© Energia